All-you-can-stamp Christmas Card Buffet - £6.00

Sunday 12 December 2010

Hello Everybody!

Well, I think it's about time, don't you?  Not blogged for ages, what with one thing and another.  Had so much on and just never found the time.

Anyway, myself and one of my lovely local downlines, Sara and her downline, Jan, are doing a mini blog hop showcasing layouts done of photographs taken at Convention and here's mine!


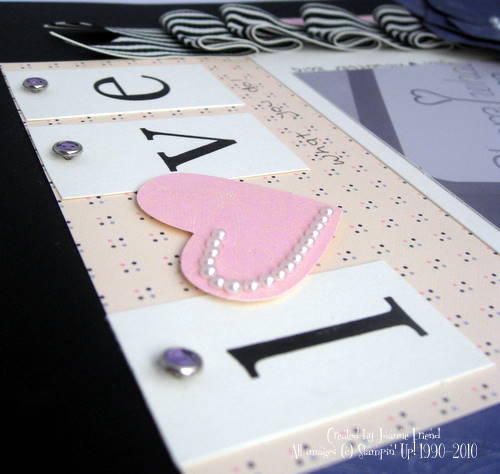
I decided to do the photograph in black and white as I know Jan loves these Lap of Luxury papers and everytime I see them I now think of her!

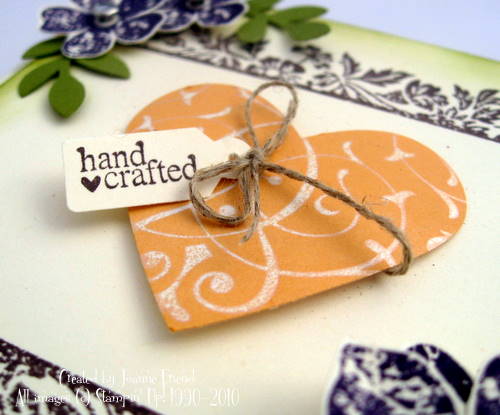
I love making the flowers - they remind me of an anemone or water lily.  These are made by punching lots of baubles with the bauble punch (approximately 15) and them sticking them around a scallop circle. They're dead easy but very effective I think.

As for the Pearls and Rhinestones - I just can't get enough of them! I love a bit of bling on my stuff!

Anyway, I know Jan and Sara both have gorgeous layouts to show, so here's a link to Sara's beautiful blog and her layout.

Bye for now, and I won't leave it as long next time, I promise!

Joanne x

ETA: Thanks everyone for the lovely comments, especially about my flower.  This is not my idea, I can't remember exactly where I first saw it, but we had a wonderful demonstration of it from Julie Kettlewell at Convention too! I just wanted to say that. There's no way I'm clever enough to come up with an idea like that! LOL!

Monday 30 August 2010

Stationery Set


Hello Everybody! This is the next class that I'm going to be doing. It's a beautiful stationery set made using the Groom Specialty papers along with Pretty ink Pink and Melon Mambo.  I love these colours together!

Here's a few more photos of what's inside the set:


Here's a quick pick of everything together.  As you can see you will make four cards, four notelets and three tags.


Here's a closeup of the cards together. All done with the Baroque Motifs stamp set. 


These are my favourites!  These little notelets are made using the Bella Toile background stamp.  It's such a beautiful background stamp, it's so versatile and it's perfect for this set!


And finally the three little tags, again made with Baroque Motifs. 

This would make a wonderful set for yourself or as a gift for someone else - get organised for Christmas!  More details about this class can be found at my website here.

TFL! Joanne x

Friday 13 August 2010

Feeling Christmassy!


I might as well be feeling Christmassy, seeing as the weather seems a bit like this at the minute! It's so cold the heating's clicked on!

This is another card I made following instructions by the amazing Michelle Zindorf on her site.  Again, I've used the branch from Bird On A Branch.  Just goes to show how versatile this set can be, two completely different cards using just one of the stamps from this set!

This card could be used as a Christmas card, or even a generic greetings card for someone who just likes snow (like me!)

Anyway, I must be off. Getting ready for the crop tomorrow. The technique we will be doing is salting, so I'll have another card to show you after we've all got ready salted!

TFL! Joanne x

Wednesday 11 August 2010

Sunset Card


Hello Everybody!

I promised you more cards using the sets that are 20% off at the minute, and here's another one using the twig from Bird on a Branch.  I love this set. It's so versatile and can be used for all sorts of occasions. 

As previously, this card is a blatant CASE of a tutorial on Michelle Zindorf's blog.  That lady sure knows how to use a brayer! The colours used are Not Quite Navy, Taken with Teal, Pumpkin Pie, Apricot Appeal and Basic Black for the inks and Not Quite Navy, Pumpkin Pie and Basic Black for the cardstocks.

TFL!

Monday 9 August 2010

Tranquil Trendy Trees


I made this card a couple of days ago and I'm really chuffed with it.  It's the first time I've had a serious go at brayering, so I decided to try something reasonably simple!

This is a CASE of a card and tutorial by the amazingly talented Michelle Zindorf.  The colours I used are Bashful Blue and Brocade Blue.  I love the say it looks so atmospheric.

Don't forget this is one of the stamp sets available in the two step offer at the minute! Instead of being £12.95, this set (Trendy Trees) is currently at 20% off and is selling at £10.36 until 31 August. If you'd like to order just get in touch!

TFL! Joanne x

Saturday 7 August 2010

Two Step Offer!

Sorry I've not posted for a while.  School holidays - you know how it is.

Well, despite being super busy with Harvey, I have managed to do a little work.  How's about this card:


It's a CASE based on a card in the Stampin' Up! catalogue.  The reason I made this card is because we have an offer on at the minute.  Quite a few of the two step stamp sets are 20% off at the minute!  Here's the ones included:

Loads of Love - was £18.95, now £15.16

Big Bold Birthday - was £23.95, now £19.16

Trendy Trees - was £12.95, now £10.36

Greenhouse Garden (pictured) - was £22.95, now £18.36

Something Sweet - was £23.95, now £19.16

Tiny Tags - was £18.95, now £15.16

Bird on a Branch - was £14.95, now £11.96

This offer is only on until 31 August, so if you'd like to take advantage, let me know as soon as possible!

Also, I have a special offer of my own to offer - free P&P on all orders from now until 1 October when the new catty comes out! On 1 September we will receive the retirement list for those stamp sets that will be leaving the catalogue, so now is the perfect opportunity to get stocked up at these special prices and with the free P&P!

If you'd like to order or book a workshop, you can get in touch with me at Joannefriend9920@aol.com.

TFL! Joanne x

Saturday 10 July 2010

Summery roses

I think it's about time I uploaded something again, don't you?!


This is a card I made yesterday. You like? Here's a little tutorial on how I made the roses.  They're probably the simplest flower you'll ever make (bar just punching them out!)


First of all, take a square of paper and round the corners.  For the roses on my card I used one piece of 3" x 3" for the large rose and two pieces of 2 1/2" x 2 1/2" for the smaller roses.  Round the corners with scissors (this isn't an exact science, just snip the corners off basically) and draw a spiral onto your paper with pencil.


Now you need to cut around your pencil spiral with scissors.  I should just point out that you don't need to use squares of patterned paper, you can use punched circles if you have circle punches that are big enough!


*GASP!* What has she done?! ;O)  You need to crumple your spiral to help soften and break the fibres in the paper to make it more malleable when it comes to rolling your rose.


Now here comes the fun bit! Starting from the outside edge, roll your spiral in towards the centre.  Don't worry if you do it too tight, just loosen your grip and your roll will relax out a little. Don't worry about it being neat, these roses are supposed to be "abstract"!


When you get to the end, place a dab of glue or a glue dot on the centre bit of your spiral and stick it down as shown. It should keep the bloom in place no problem.  If not just add a bit more glue.


And there you have it! The sky's the limit with these roses.  It's a great technique for using scraps of patterned paper or cardstock.  You could add a bit of bling with Dazzling Diamonds glitter, Shimmer Paint or Crystal Effects. 

For the card above I used the following:

Cardstock - Whisper White, Tempting Turquoise, Regal Rose
Ink - Pumpkin Pie
Designer Series Paper - Pink Flamingo
Ribbon - Pretty in Pink Tafetta, Old Olive Grosgrain
Button - Playground Buttons
Sentiment - Sincere Salutations
Border Punch - Vintage Lace

All products Stampin' Up!

Tuesday 22 June 2010

A little birdie....


Just a quick post today.  Here's a card I made using Bird on a Branch.  I find this is one of those sets that doesn't do itself justice in the catalogue, but then when you get it and actually use it you see just how fab and versatile it is.  It's quickly become one of my "go to" sets, because it doesn't matter what you do with it, you always get a fabby result.

For this card I've used my colour combination of the moment - Melon Mambo, Pretty in Pink, Basic Black and Whisper White.  The patterned paper is from the Night & Day DSP. I'm using Melon Mambo a lot, I love it!

TFL! Joanne x

Wednesday 16 June 2010

Christmas in July!

Yeah! Middle of June and I'm already thinking about Christmas!

The above photo is a collection of cards I will be doing at my next workshop on 3 July.  It will be a One Sheet Wonder, whereby we decorate a sheet of 12x12 Whisper White with the gorgeous Serene Snowflakes stamp set and squoosh it with Shimmer Paint, then use it to make 18 Christmas cards.

So by the end of the workshop, at the very beginning of July, you've already made 18 Christmas cards.  How organised are you?!

We will be using lots of different techniques in this workshop. Below are some of my favourites that are included in the set.


Sorry about the poor pictures, my camera AND computer are playing up at the minute. :O(


Shaker card!


Large baubles!


Even a treat cup! YAY!

If you'd like to book onto the workshop, just have a look at my website HERE.  That's where all the details are.

TFL! Joanne x

Sunday 16 May 2010

Flight of the Butterfly Stationery


Well, here are my latest creations which are going to be my next class.

This little chest of drawers is the perfect size for little embellishments and is done in the beautiful Bella Bleu papers from Stampin' Up! I decided to use these papers because they are neutral and will fit into any decor, making them perfect for anybody's crafting corner!

Now here's the good news - due to popular demand I've managed to book another class for June.  It will take place on Saturday 12th June.  When we will be making both the projects shown above! As well as the minature drawers we will also make an ingenious little bag containing four co-ordinating cards.  I've teamed the Bella Bleu papers with the gorgeous stamp set Flight of the Butterfly which is wonderful for any occasion. 

Here's a closer look at the four cards:


The prices for this class vary, as to whether you have just the kit, or if you include a stamp set and punch.  If you have the lot you get two free ink pads!  More details can be found here.

Any queries please just get in touch.

TFL! Joanne x

Saturday 1 May 2010

New Colours are coming!


All these gorgeous goodies are available for purchase now!

These three colours - Melon Mambo, Rich Razzleberry and Soft Suede are part of the new colours which will be available from October in our new catalogue. But why wait until then?! You can get your hands on them right now!

The ink pads and cardstock will be available in the new catalogue in October, but the Designer Series Paper, Window Sheets and gorgeous polka dot ribbon is limited edition and only available while stocks last, so you need to be quick if you'd like them!

If you'd like to be one of the first to get your hands on these yummy goodies, just contact me to place an order.

TFL! Joanne x

Thursday 29 April 2010

Civil Ceremony Thank You Card


Hello Everybody! Sorry, I've been completely neglecting this blog again I'm trying to do 101 things at once at the minute!

Today I'm showing you a simple thank you card I've done.  A dear friend of our family is getting married to her partner in a couple of weeks and, when asked what they would like as a gift, she asked me if I could make some thank you cards for them, as our wedding gift to them.

As you can imagine, I was extremely flattered that she'd asked me.  I'm not sure what the colour scheme is, so I've kept it quite neutral, and as I was making 50 cards I wanted to keep them quite simple!

The cardstock I've used for the main body of the card is Kraft.  The foliage stamp I have used is from Vintage Vogue, which I love because it is so versatile. I stamped this in Old Olive ink. 

The heart is punched using the Full Heart Punch out of the beautiful Very Vanilla Bridesmaid Designer Series Paper, I tied twine around it and punched a little tag using the small tag punch and stamped it with the sentiment from the Tiny Tags set.


And here is the finished result!  I just hope they like it.....!

TFL! Joanne x

Tuesday 13 April 2010

Scrapbook in a Box and Criss Cross Card


May is National Scrapbooking Month, and to celebrate this, my next class on 8 May we will be making a Scrapbook in a Box and a Criss-Cross card using the beautiful Vintage Vogue set.


The box is very similar to an exploding box, but simpler and not as time consuming to make!  If you don't want to make it into a scrapbook, you can always just make it into a regular keepsake/gift box.  But this is what it looks like inside as a scrapbook:


It opens up into a 12" x 12" scrapbook page! Pretty cool, huh?!


Additionally, we will be making a Criss Cross card to match the box, so you can give the whole set as a gift if you can bear to part with it!


During the class we will learn two techniques - brayering and rock n' roll.  You will get everything in your class to complete these two projects.  The class costs £10, or £25 if you include the Vintage Vogue stamp set (regular price £19.95). For more details and to book a place on the class take a look here.

For those who can't come to the class, the materials used are Very Vanilla, Apricot Appeal and Elegant Eggplant cardstock, Bride DSP, Chocolate Chip, Apricot Appeal, Old Olive and Elegant Eggplant inks, clear rhinestone brads and twine.

TFL! Joanne x

Wednesday 7 April 2010

Colour Renovation - It's Coming!!

Okay, so I know how much you all like your Stampin' Up! colours, and how everything co-ordinates.  Well announcements have been going up all over the internet and so I feel I can announce the news here.  The Stampin' Up! colours are having a renovation!

Here's the new look list:


The new palette is fantastic.  Ever since SU! first came to the UK we have been asking for the beautiful In Colours - we are getting them, and in future they will last for two years instead of just one. As with the existing palette, there will be lots of co-ordinating products including ribbons, buttons and accessories, so still lots to play with!

As you can probably tell from the above chart, a number of colours, which were deemed not as popular, are being discontinued.  But you still have plenty of time to stock up on your favourites as the new Colour Renovation doesn't come into effect until the new catalogue starts in October. So if you like any particular colours, get your orders in while you can! Here is a full list of the colours which are being discontinued:


Don't forget we also have the Mini Catalogue which has just come out, so lots to keep us happy and busy for the next six months until this awesome change takes place.

If you have any questions, or if you would like to place an order, please get in touch with me.

TFL! Joanne x

Monday 5 April 2010

Treat Cups Tutorial!


A few days ago I promised a tutorial based around the marvellous treat cups we now have in the Mini Catalogue. Well, here it is!


Okay, so first of all I start by doing my little picture.  For this card I'm using my favourite, the bubblegum machine again.  First I stamp the base, then I line up my 1 3/4" punch by the base and punch my hole for the treat cup, then I use my Stamp-a-ma-jig to stamp the little lid on top of my treat cup hole.


Next, I place my image over my mat (DO NOT stick it down yet!) I can then line my punch up over the hole and punch the hole out of the mat as well.


I then take them apart and sandwich my treat cup between my picture and the mat as shown. The treat cup has double sided tape on and is easy to line up on the mat. Then it's just a case of adding adhesive to the picture and placing it on top.


Next I take my actual card and punch a hole about a third of the way down. You don't need to use the 1 3/4" punch for this, you just need a hole that's big enough to get your treat through.  For this card I used a 3/4" punch.


Next, you need to make a "door" to cover your 3/4" hole, so you can keep your treats in place when they're not being eaten! 

Take a piece of co-ordinating cardstock sized at 2" x 2 1/2" and attach a punch tab to the end of it. This will be your door. Stick double sided tape around your matted picture, just on three sides, and attach it to your card.  Your little door should slide in from the left and cover the hole.


Fill your card with your chosen treat and slide the door into place.


Add your finishing touches, and there you have it - a gorgeous treat cup card!  They can seem fiddly to make at first, but once you get the hang of it they're very straight forward.

The materials used for this card are Real Red and Whisper White cardstock, a piece of patterned paper from the Pink Flamingo Designer Series Papers, 1/2" striped grosgrain ribbon in Real Red, Real Red ink and the Something Sweet stamp set and treat cups. The punches used are 1 3/4" circle, 3/4" circle and Round Tab Punch. All items are from the Stampin' Up! current catalogues.

Hope you like this card.  Remember, if you have any questions, or if you'd like to purchase anything from Stampin' Up! I'd love to hear from you!

TFL! Joanne x

Friday 2 April 2010

A Blue Card for a Blue Day!

Hello Everybody!  Just in case you didn't know, today is World Autism Awareness Day.  Autism is a condition which is very close to my heart as my son is on the autistic spectrum. 

As part of World Autism Awareness Day, supporters need to wear something blue.  I'm sitting here in my blue jeggings and blue top, and I thought I'd show you a quick blue card that I've done to.  Here it is:


It's made using one of my favourite colours, Bashful Blue.  The stamp set I've used is Flight of the Butterfly, the "grass" is made using a strip of Old Olive cardstock that I've snipped using my Paper Snips.  It's finished off with a Chocolate Chip tafetta ribbon to match the Chocolate Chip background flowers and the flower accent on the butterfly.  Hope you like it!

TFL and I'll be back again soon! Joanne x

Thursday 1 April 2010

It's here and it's live!


No joke - the hugely anticipated new mini catalogue is now live! You can order anything you want out of it!


The most popular item seems to be the bird punch so far.


I made this card using the bird punch and the beautiful new Vintage Vogue set. Colours are Pale Plum and Chocolate Chip ink on Whisper White cardstock.  The card itself is our Kraft cardstock and the little bit of sparkle is our Dazzling Diamonds glitter.


I love everything in our new mini catty, but at the minute I'm loving the treat cups most!  I made this card yesterday.  The striped paper comes from the gorgeous Sweet Pea papers. The cardstock used is Rose Red and Pumpkin Pie, together with Chocolate Chip ink.  I've also used the Tab Punch, Eyelet Border Punch and Pretty in Pink tafetta ribbon.

They may seem complicated to do, but they're not once you're shown how.  I'll try and do a tutorial tomorrow or sometime this weekend, so keep checking back!

If you haven't got a copy of the mini catalogue and would like one, please get in touch with me.  Otherwise you can have a browse by following the link on the right hand side of my blog. Just click on the picture!

If temptation is getting the better of you and you'd like to order please just get in touch!

TFL! Joanne x