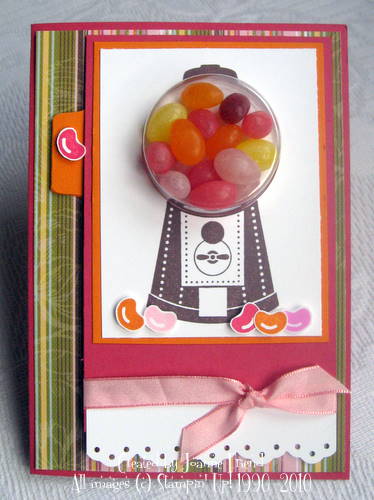
A few days ago I promised a tutorial based around the marvellous treat cups we now have in the Mini Catalogue. Well, here it is!

Okay, so first of all I start by doing my little picture. For this card I'm using my favourite, the bubblegum machine again. First I stamp the base, then I line up my 1 3/4" punch by the base and punch my hole for the treat cup, then I use my Stamp-a-ma-jig to stamp the little lid on top of my treat cup hole.

Next, I place my image over my mat (DO NOT stick it down yet!) I can then line my punch up over the hole and punch the hole out of the mat as well.

I then take them apart and sandwich my treat cup between my picture and the mat as shown. The treat cup has double sided tape on and is easy to line up on the mat. Then it's just a case of adding adhesive to the picture and placing it on top.

Next I take my actual card and punch a hole about a third of the way down. You don't need to use the 1 3/4" punch for this, you just need a hole that's big enough to get your treat through. For this card I used a 3/4" punch.

Next, you need to make a "door" to cover your 3/4" hole, so you can keep your treats in place when they're not being eaten!
Take a piece of co-ordinating cardstock sized at 2" x 2 1/2" and attach a punch tab to the end of it. This will be your door. Stick double sided tape around your matted picture, just on three sides, and attach it to your card. Your little door should slide in from the left and cover the hole.

Fill your card with your chosen treat and slide the door into place.
Add your finishing touches, and there you have it - a gorgeous treat cup card! They can seem fiddly to make at first, but once you get the hang of it they're very straight forward.
The materials used for this card are Real Red and Whisper White cardstock, a piece of patterned paper from the Pink Flamingo Designer Series Papers, 1/2" striped grosgrain ribbon in Real Red, Real Red ink and the Something Sweet stamp set and treat cups. The punches used are 1 3/4" circle, 3/4" circle and Round Tab Punch. All items are from the Stampin' Up! current catalogues.
Hope you like this card. Remember, if you have any questions, or if you'd like to purchase anything from Stampin' Up! I'd love to hear from you!
TFL! Joanne x