It's that time of year again folks! When we all start thinking about what to give our kids' teachers as a token of appreciation (or should that be badge of honour?!) for putting up with our little darlings all year! One of Harvey's trainee teachers left last week, and this is what I made her.
It's a small origami box made out of Island Indigo cardstock and the gorgeous Twitterpated paper. Inside are six 3" x 3" notelets with matching envelopes made from Twitterpated paper using our fabulous new scoreboard.
Each notelet was the same. I made them using Lucky Limeade cardstock and Twitterpated. I cut a square to one side of the DSP and filled it with a little "postage stamp" made using Perfect Postage stamp set and our matching stamp. Each one was finished with a small rhinestone.
As you can see, they all fitted neatly in to the box!
I used the scoreboard again to make the lollipop nedallion on top with more of the Twitterpated paper and finished it with one of our Antique Brads and some pleated ribbon.
I also made a quick card to match using the lovely new Tea Shoppe stamp set, the Twitterpated and pleated ribbon.
She was really thrilled with it, so I hope this gives you a bit of an idea of what you can do for teachers!
TFL! Joanne x
Monday, 25 June 2012
Sunday, 17 June 2012
Nostalgia and Inspiration
If there's one thing I love, it is roses and gypsophilia. I always like to have a small vase of them somewhere in my house. They're not "on trend" in the floristry world any more, but for me they always provoke wonderful memories of my youth.
I remember, during the mid-late 80s, going to friends' weddings. In those days, the fashion was for huge bouquets of roses and gypsophilia and also huge coronets of the same flowers in their hair. I remember bridesmaids and flower girls with pomanders and hoops made from the same combination, usually in pastel shades of pink or peach. Just the sight of roses and gypsophilia takes me right back to those times, memories of lovely celebrations - the build up, the excitement and the actual day, and that's why I love them so much.
The reason I'm telling you all this is because the most recent bunch I got (pictured above) inspired me to create the following card:
It didn't start out as an easel card, and it just evolved into one. The stamp sets I've used are Everything Eleanor (#124162 wood, #124164 clear) and Petite Pairs for the sentiment (#122495 wood, #122497 clear). The large frame was stamped onto Basic Grey cardstock (#121689) with Basic Grey ink (#109120). The flourishes were stamped with Whisper White Craft ink (#101731) and embossed with white embossing powder (#109132).
The roses were made to look shabby chic by punching out 1 3/4" circles (punch - #119850) of Pink Pirouette cardstock (#116203) and scrunching them up. I then separated them into two layers (like the faux suede technique) and cut them into spirals. They were then rolled up and glued. Separating the layers made them more pliable and easier to work with.
The teeny "gypsophilia" type flowers are made from Whisper White cardstock (#106549). For each flower I punched out two small flowers using the Itty Bitty Shapes Punch Pack (#118309), glued them together and stuck a small rhinestone (#119246) in the middle.
The other punches used on this card are 1" circle (#119868), 1 1/4" circle (#119861), Large Oval (#119855) and Scallop Oval (#119856). The corners are punched with the Scallop Trim Corner punch (#118870).
TFL! Joanne x
Thursday, 31 May 2012
St Petersburg in the Snow
Hello Everybody!
Well, after my journey to India yesterday, I got to thinking more about World travels and decided to have a go at turning an Indian Temple into a Russian Orthodox Cathedral!
For this card, I started with Basic Grey base (#121689) for the sky and stamped it with Basic Grey ink (#109120) and the flourish stamp from the Everything Eleanor set (#124162 wood, #124164 clear) (you can't beat a good flourish, I say - comes in handy all the time!). I then stamped the snowflakes using the triple snowflake stamp from the Serene Snowflakes set (#115438 wood only). I stamped these in Whisper White Craft ink (#101731), added Heat and Stick powder (#100625) and then sprinkled them with Dazzling Diamonds glitter (#102023). The actual domes were made from the Big Top Birthday Designer Series Paper (#122348), with the pillars made from Cajun Craze cardstock (#121683) run through the Big Shot (#113439) with the Square Lattice embossing folder (#119976) to give the impression of ornate brickwork.
I then stuck them together and sprinkled a little Dazzling Diamonds across the tops to look like snowfall. As with the Indian Sunset card, I coloured some pearls (#119247) with permanent markers to hide the edge. I then stuck them all on at various heights to give a 3d effect using Dimensionals (#104430). The whole thing was then matted onto Whisper White cardstock (#106549) and placed on a Real Red cardstock (#106578) card base.
Hope you like it. I think this would make a really unusual Christmas card!
Now I'm off again to see where my travels take me next! TFL! Joanne x
Wednesday, 30 May 2012
Indian Sunset Card
One thing I love to do is play with a brayer. I take great inspiration from Michelle Zindorf, who is the most amazing brayer artist I've come across.
I took inspiration for this card whilst recently watching a documentary about India. I'm at the stage where I see potential in everything, and when I saw a beautiful sunset over a temple, I thought how I could recreate that!
I punched a circle from a Post-it Note and stuck it to some Very Vanilla cardstock. This created the mask for my sun. Starting from the top, I then brayered the whole page with So Saffron ink (#105213). I then followed this with Pumpkin Pie ink (#105216), again running it down the page but this time letting it fade out towards the bottom. Finally I used some Tangerine Tango (#111834) for the top third of the picture, and then a little Riding Hood Red (#111836) at the very top finished the sunset.
If you hadn't guessed, the domes and minaret were created using the Ornament punch (#119847) out of Basic Black cardstock (#121688). The decorative beading around the domes are SU! pearls (#119247) coloured with permanent black marker. The two birds were made using the sides of the Round Tab punch (#119864), and the photo corners, made from the Curly Label punch (#119851) out of Brushed Gold cardstock (#124917) finished the picture.
It was then matted onto Very Vanilla (#106550) and Basic Black (#121688) cardstock and set on a Riding Hood Red (#116205) card.
I know a lot of people get scared of brayering. Hopefully soon I'm going to do a class called "Brayering for the Terrified". Watch this space!
TFL! Joanne x
Tuesday, 29 May 2012
Jubilee Lollies!
Hello Everybody!
Here's a quick and cheap idea for table centres if you're having a Jubilee street party or party at school. I found these lollies called "Brit Pops" in my local Poundland and immediately thought the colours would match SU! Real Red and Pacific Point! Always thinking SU!
When I got them home I made them into flowers using our new Blossom Punch (#125603) and Brights Collection Designer Series Paper Stack (#117155). The leaves were made using the Ornament Punch (119847) and Lucky Limeade cardstock (#124388).
I then stuck them all in a small tin bucket I had which I had filled with floral Oasis. I finished it off with Organza Ribbon (#114319) tied around the pot and I made a few bows and stuck then here and there in the arrangement.
I think they look really sweet and summery and with the colour scheme I think most people would love to get one - if you can bear to take the arrangement apart!
TFL! Joanne x
Thursday, 10 May 2012
Next Class - Introducing the Scoreboard!
Hello Everybody!
This month's class is really rather special! To celebrate the launch of the Summer Mini Catalogue and the arrival of our brand new Scoreboard, the mini album we will be making centres around this product!
We will be using several techniques to construct the album, it's mechanism and various elements and decoration.
As well as this, we will be using the brand new Framelits and Apothecary Art stamp set from the new catty.
The gorgeous papers used are the new Twitterpated range, which are, once again, just released and available in the Summer Mini catalogue.
All in all we will make a beautiful mini album, perfect for all your Summer photos. The price of this class will be £12.50 - BUT THAT'S NOT ALL!
The new Stampin' Up! Scoreboard is available with Imperial measurements (inches) as standard and grooves every 1/8". The price is £25.95 and it comes complete with a stylus tool which, as well as scoring is perfect for making dots or shaping paper flowers. It also comes with three markers so you always know where to score.
The great thing about this board is that you can buy add ons in the form of a metric scoreplate (£10.95) and a diagonal score plate (also £10.95). You do not need to buy a completely new board just to get metric measurements!
But that's not the best part - if you buy the Scoreboard from me this month, you will get the mini album class absolutely FREE! Even if you can't come to the class, you can receive instructions and a kit so you can still construct your own mini album. I can either post them to you or, if you live locally to me and would like me to come and do your own personal class in your home or community space, I'm more than happy to do so. For more details see my website HERE.
I hope you like the look of this album and, even if you can't attend the class, it gives you plenty of inspiration!
TFL! Joanne xx
This month's class is really rather special! To celebrate the launch of the Summer Mini Catalogue and the arrival of our brand new Scoreboard, the mini album we will be making centres around this product!
We will be using several techniques to construct the album, it's mechanism and various elements and decoration.
As well as this, we will be using the brand new Framelits and Apothecary Art stamp set from the new catty.
The gorgeous papers used are the new Twitterpated range, which are, once again, just released and available in the Summer Mini catalogue.
All in all we will make a beautiful mini album, perfect for all your Summer photos. The price of this class will be £12.50 - BUT THAT'S NOT ALL!
The new Stampin' Up! Scoreboard is available with Imperial measurements (inches) as standard and grooves every 1/8". The price is £25.95 and it comes complete with a stylus tool which, as well as scoring is perfect for making dots or shaping paper flowers. It also comes with three markers so you always know where to score.
The great thing about this board is that you can buy add ons in the form of a metric scoreplate (£10.95) and a diagonal score plate (also £10.95). You do not need to buy a completely new board just to get metric measurements!
But that's not the best part - if you buy the Scoreboard from me this month, you will get the mini album class absolutely FREE! Even if you can't come to the class, you can receive instructions and a kit so you can still construct your own mini album. I can either post them to you or, if you live locally to me and would like me to come and do your own personal class in your home or community space, I'm more than happy to do so. For more details see my website HERE.
I hope you like the look of this album and, even if you can't attend the class, it gives you plenty of inspiration!
TFL! Joanne xx
Sunday, 6 May 2012
Origami Gift Basket Video Tutorial
Hey Everybody!
I don't do this often, but today I've gone all technical and made a video of how to make this cute little origami basket. It just takes a 6"x6" piece of patterned paper and is just the right size to hold a Ferrero Rocher chocolate!
You can make them any size. You will see in the video that I made another out of a 12" x 12" piece of paper. It's still a nice size and holds so much - perfect for gifts.
As you would imagine, this is not my idea. My basket is based on the work of Tethered2Home and Origami Mommy, and I thank them for the inspiration!
I went to our Team Training a couple of weeks ago and made these as my swaps. They were really appreciated and so I thought I'd share them with everyone. Here's a photo of some of my swaps:
I think they look really sweet all lined up together! I used papers from the In Colour Designer Series Paper pad.
Anyway, without further ado, let's go on with the show!
Origami Gift Basket Tutorial
Any questions just let me know. TFL! Joanne x
I don't do this often, but today I've gone all technical and made a video of how to make this cute little origami basket. It just takes a 6"x6" piece of patterned paper and is just the right size to hold a Ferrero Rocher chocolate!
You can make them any size. You will see in the video that I made another out of a 12" x 12" piece of paper. It's still a nice size and holds so much - perfect for gifts.
As you would imagine, this is not my idea. My basket is based on the work of Tethered2Home and Origami Mommy, and I thank them for the inspiration!
I went to our Team Training a couple of weeks ago and made these as my swaps. They were really appreciated and so I thought I'd share them with everyone. Here's a photo of some of my swaps:
I think they look really sweet all lined up together! I used papers from the In Colour Designer Series Paper pad.
Anyway, without further ado, let's go on with the show!
Origami Gift Basket Tutorial
Any questions just let me know. TFL! Joanne x
Friday, 4 May 2012
Blurred Vision Technique
Hello Everybody!
I love stamps that I can colour in. And there are a few sets in the new Summer Mini catalogue that are perfect for this. I think my favourite is Bordering on Romance that I've just acquired.
Sometimes though, I can be very lazy. I want to use my line drawn images, but I can't be bothered to colour them in. This is where the "Blurred Vision" Technique comes in!
The image on this card is from the Bordering on Romance set. I stamped it onto Confetti Cream cardstock. I prefer to use that for this technique as it has a more "rustic" look to it. The image was stamped with Soft Suede ink, but you can use any of the water based Classic ink pads to suit your colour scheme.
You then either take a blender pen or a watercolour brush and gently go over the lines, smudging the ink to make a softer outline and a more "blurred vision" look to the image. Once I was happy with how blurred I'd made it, I inked the edges with Soft Suede to blend in with the artwork and give a more aged, vintage feel.
The image was then matted onto Soft Suede and Pink Pirouette cardstock. The patterned paper I used is from the Beau Chateau range of Designer Series Paper. The sentiment is from Teeny Tiny Wishes and stamped onto a banner cut from the Petal Cone Bigz L Die. The card was finished off with a few butterflies from my all time favourite Embosslits die - Beautiful Wings. I hope you like this card and have a go at the Blurred Vision technique!
Card recipe:
Stamp sets - Bordering on Romance #125482, Teeny Tiny Wishes #115370
Cardstock - Pink Pirouette #116203, Soft Suede #119982, Confetti Cream #106558, Very Vanilla #106550
Ink - Soft Suede #115657
DSP - Beau Chateau #122357
Embellishment - Pearls #119247
Embosslits Die - Beautiful Wings #118138
Bigz L Die - Petal Cone #121810
TFL! Joanne x
I love stamps that I can colour in. And there are a few sets in the new Summer Mini catalogue that are perfect for this. I think my favourite is Bordering on Romance that I've just acquired.
Sometimes though, I can be very lazy. I want to use my line drawn images, but I can't be bothered to colour them in. This is where the "Blurred Vision" Technique comes in!
The image on this card is from the Bordering on Romance set. I stamped it onto Confetti Cream cardstock. I prefer to use that for this technique as it has a more "rustic" look to it. The image was stamped with Soft Suede ink, but you can use any of the water based Classic ink pads to suit your colour scheme.
You then either take a blender pen or a watercolour brush and gently go over the lines, smudging the ink to make a softer outline and a more "blurred vision" look to the image. Once I was happy with how blurred I'd made it, I inked the edges with Soft Suede to blend in with the artwork and give a more aged, vintage feel.
The image was then matted onto Soft Suede and Pink Pirouette cardstock. The patterned paper I used is from the Beau Chateau range of Designer Series Paper. The sentiment is from Teeny Tiny Wishes and stamped onto a banner cut from the Petal Cone Bigz L Die. The card was finished off with a few butterflies from my all time favourite Embosslits die - Beautiful Wings. I hope you like this card and have a go at the Blurred Vision technique!
Card recipe:
Stamp sets - Bordering on Romance #125482, Teeny Tiny Wishes #115370
Cardstock - Pink Pirouette #116203, Soft Suede #119982, Confetti Cream #106558, Very Vanilla #106550
Ink - Soft Suede #115657
DSP - Beau Chateau #122357
Embellishment - Pearls #119247
Embosslits Die - Beautiful Wings #118138
Bigz L Die - Petal Cone #121810
TFL! Joanne x
Tuesday, 1 May 2012
Welcome to the Summer Mini Blog Hop!
Hello Everybody!
If you're starting at my blog, welcome to the Summer Mini Blog Hop! Or if you've come here from witnessing the beautiful work of the wonderfully talented Sara, then welcome to my blog and I hope you're enjoying the hop!
Here's the card I've made using an item from the Summer Mini:
I admit now, I have cheated a bit. The stamp I chose to use is the Scallop Shell, which was also in the Spring Mini. I know that a few of my fellow stampers and customers have found this stamp "challenging" to use, so I thought I'd give it a go, as I love the seaside and sea shells generally.
The technique I used was faux linen. I took a piece of glossy cardstock and stamped it with the background stamp En Francais and Soft Suede ink. I then took some sandpaper and sanded it in a vertical direction all across the cardstock and then in a horizontal direction.
After that I brayered Pool Party ink onto the cardstock, then inked the edges with River Rock and Soft Suede. The Scallop Shell was stamped in Early Espresso ink.
The card mount is River Rock and the patterned paper is part of the Timeless Portrait collection of Designer Series Paper. The doily is from the Perfect Pennants die. To give this an aged look, I cut it from Very Vanilla cardstock, crumpled it up and then separated it into two layers. Then I inked it with Soft Suede ink.
Twine was wrapped around the faux linen piece and attached to the page with dimensionals. The sentiment is from the Teeny Tiny Wishes set stamped onto the banner from the Petal Cone die. The seam binding is the new Pool Party colour from the Summer Mini and this was aged with a little Soft Suede ink.
The whole thing was finished off with an antique brad and some pearls, then squooshed with the spritzer and Early Espresso marker.
I hope you like my contribution to the blog hop and if you have any questions about my card please get in touch.
Now I shall hand you over to the lovely Leanie to see her gorgeous work!
TFL! Joanne x
If you're starting at my blog, welcome to the Summer Mini Blog Hop! Or if you've come here from witnessing the beautiful work of the wonderfully talented Sara, then welcome to my blog and I hope you're enjoying the hop!
Here's the card I've made using an item from the Summer Mini:
I admit now, I have cheated a bit. The stamp I chose to use is the Scallop Shell, which was also in the Spring Mini. I know that a few of my fellow stampers and customers have found this stamp "challenging" to use, so I thought I'd give it a go, as I love the seaside and sea shells generally.
The technique I used was faux linen. I took a piece of glossy cardstock and stamped it with the background stamp En Francais and Soft Suede ink. I then took some sandpaper and sanded it in a vertical direction all across the cardstock and then in a horizontal direction.
After that I brayered Pool Party ink onto the cardstock, then inked the edges with River Rock and Soft Suede. The Scallop Shell was stamped in Early Espresso ink.
The card mount is River Rock and the patterned paper is part of the Timeless Portrait collection of Designer Series Paper. The doily is from the Perfect Pennants die. To give this an aged look, I cut it from Very Vanilla cardstock, crumpled it up and then separated it into two layers. Then I inked it with Soft Suede ink.
Twine was wrapped around the faux linen piece and attached to the page with dimensionals. The sentiment is from the Teeny Tiny Wishes set stamped onto the banner from the Petal Cone die. The seam binding is the new Pool Party colour from the Summer Mini and this was aged with a little Soft Suede ink.
The whole thing was finished off with an antique brad and some pearls, then squooshed with the spritzer and Early Espresso marker.
I hope you like my contribution to the blog hop and if you have any questions about my card please get in touch.
Now I shall hand you over to the lovely Leanie to see her gorgeous work!
TFL! Joanne x
Thursday, 5 April 2012
April Class Now Booking!
Hello Everybody!
This post is to announce that April's class is now booking. It will take place on 28 April at Beauchief Baptist Church, Sheffield.
As you can see from the photo above, we will be making four cards complete with a co-ordinating box using the Creative Elements stamp set. I'll now take you through the cards we will be making.
The first card will be made using the stamping off technique and two colour marker blending technique to produce the above card. I've tried to make all the cards as generic as possible but you are more than welcome to make changes to suit your own needs.
To make this card we will be getting to grips with the paper crimper and also the Stamp-a-ma-jig. The colours I have used for this set are Crumb Cake, Old Olive, Early Espresso and Calypso Coral.
For this next card we will be using paper piecing techniques and also distress embossing to make a very simple but very striking card.
The final card will use the main filigree stamp to make a floral design including ruffled ribbons.
If you'd like to book a place on this class please visit my website HERE. There are various options and add ons that you can have. Also, please remember that if you spend over £45 this month you will receive a set of patterned papers of your choice and this class qualifies for this! Hope to see you there!
TFL! Joanne x
Tuesday, 3 April 2012
Love Card
Hi Everybody!
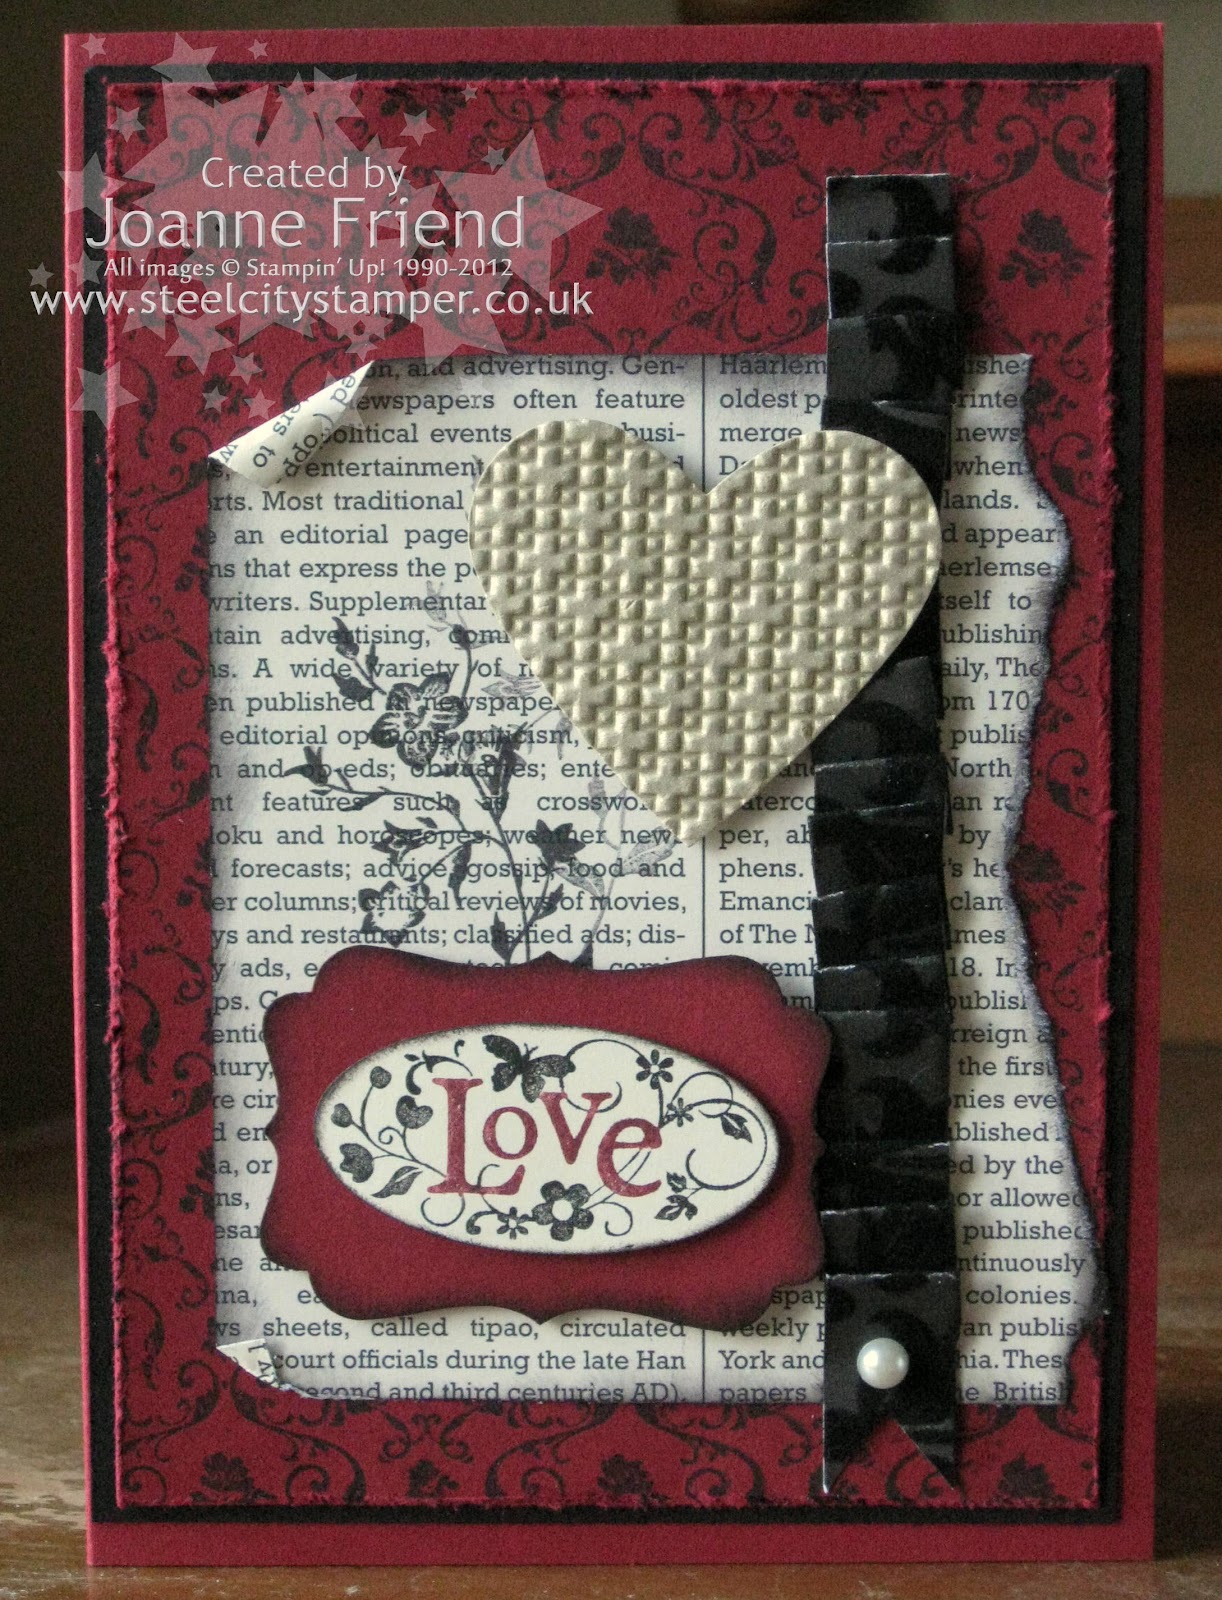
Just a quick card today. I made this using a couple of sets from the Spring Mini. The "Love" sentiment is made using You Are Loved (123779 - clear) and the little foliage behind is from the sweet Charming set (125829 - clear). The background stamp is called Parlour Prints (122525) and is from the main catalogue.
Colours used are Basic Black, Cherry Cobbler, Very Vanilla and Brushed Gold.
The reason I posted this card is to remind everyone that the Spring Mini will be ending at the end of April to make way for the Summer Mini catalogue that will be going live on 1st May, so if you've been putting off getting anything, then get it quick!
Hope you like this card. Any questions or queries about it please just get in touch.
TFL! Joanne x
Saturday, 31 March 2012
Peep-O! Happy Easter!
How do you like this cute little hen house?! It's super easy to make, let me show you how!
First, take an A4 sheet of Crumb Cake cardstock. Along the long side, score it at 7cm, 14cm, 21cm and 28cm. Along the short side, score it at 5cm and 14cm.
Now is the time to stamp your woodgrain on your hen house. The easiest way to do this is to fold your cardstock in half on the score line. Ink the Woodgrain background stamp (117100) up with Crumb Cake ink, and stamp on the cardstock so the middle squares are covered. Flip it over and do the same for the other side, so all four middle squares are stamped. Don't worry if you get the image on parts of the top and/or bottom squares. It doesn't matter and it won't show.
Next we need to make the door hole for our hens to go in and out! Turn your cardstock over and, with the five cm score line at the bottom, (the side with only two flaps at the bottom) fold the second flap inwards as shown above. Centre your punch between the vertical score lines and push it in as far as it will go. Then punch the hole out.
Now you're annoyed because you've punched a hole in your flap as well as your house - don't worry!
As you can see from the photo above, trim the flap off just below the hole, so you have a piece of flap remaining that is approximately 1cm wide. Apply glue to the small flap at the far left, and all three bottom squares apart from the one with the hole above it - see photo above.
Fix the small flap to the edge of the "wall" and fold the bottom flaps inwards to make the floor. It doesn't matter what order you do them in, but obviously the one with no glue gets turned in last. Ta-dah! You have your hen house!
Now we need to make a little "roosting bar" for our little chick to "perch" on. Here goes:
You need to cut a square of Crumb Cake Cardstock 8.8cm or 88mm. That's just a fraction short of 9cm. This measurement is important as you need your perch ever so slightly smaller than the box so it slides in easily.
You then need to score it on all four sides at 1cm. Stamp the cardstock again with your Woodgrain background stamp and Crumb Cake ink pad. Cut up to make the little tabs on each of the score lines by 1cm to make little tabs and attach glue or sticky strip to these. Punch a hole in the centre using your 1 3/8" punch (you will have to bend the flap down as you did before with the main box, but it won't punch anything out of the flap).
Slide it into your hen house.
Now we need a roof to keep him warm and dry. Let's make one!
Take a piece of Chocolate Chip cardstock measuring 9cm x 14cm. Score it in half along the 14cm side at 7cm. Then put the whole piece through a paper crimper (or ribbler as I like to call it, just because I love that word!) so it looks a bit like corrugated iron or something......!
Attach one half of the roof to the back flap of the box, allowing a little overhang at the back.
The front part of the roof can be held in place with either a small glue dot or a piece of velcro if you've got some handy.
To decorate the house I used the Bird Builder Punch (117191) for the foliage which I punched in Old Olive cardstock and the flowers were made using the Boho Blossoms Punch which were punched with Melon Mambo cardstock and small pearls (119247). The sentiment on the roof is from the Easter Blossoms stamp set (122057 - from the Spring Mini catalogue) and punched out using the Extra Large Oval Punch (119859).
The chick I have used is a Smarties Easter chick available from most newsagents and supermarkets. Here he is nestled in his coop (he fits very cosily in the hole of his "perch" at just the right height to be seen through the "doorway", with a few other eggs that haven't hatched yet. ;O)
The "straw" to make his nest is made by cutting very thin strips (about 1-2mm) of So Saffron cardstock and feeding them through the ribbler. Then arrange them around him and putting the other eggs on top of it.
Close the roof down with your glue dot or velcro and there you have it! A lovely little chicken coop with chocolate eggs and a little chick that's already hatched!
I hope you like this tutorial. If you have any queries or would like to order all or any of the components to make these Easter boxes, please just get in touch.
TFL! Joanne x
Tuesday, 13 March 2012
March Class Now Booking!
Hello Everybody!
This is March's class which is now open for booking. This month we will be making a paper bag album using the Tickets and Tags Simply Scrapping Kit. It's a fantastic album, if I do say so myself (!) with loads of mats for photos and journalling and 15 pull out tags and cards for additional bits and pieces. There's also plenty of room to keep mementoes of special days.
The basic cost of this kit is £20. That includes half a pack of Simply Scrapping (you will still have plenty left to make a few cards or embellish other scrapping projects). There is also an option to include the ink pad that we use and also another option to include the wonderful Number It stamp set that I have used for the album's title.
If you'd like to book on this class, it will be taking place on Saturday, 24 March at Beauchief Baptist Church, Hutcliffe Wood Road, Sheffield. All details can be found at my website HERE.
And if you don't live close by or can't make it, FEAR NOT! I am going to offer instructions by email and/or a kit so you can still enjoy making this album yourself in the comfort of your own home. Just keep an eye on my website and I'll let you know when the info is ready!
Any questions please get in touch. Otherwise hope to see you there!
TFL! Joanne x
Subscribe to:
Posts (Atom)