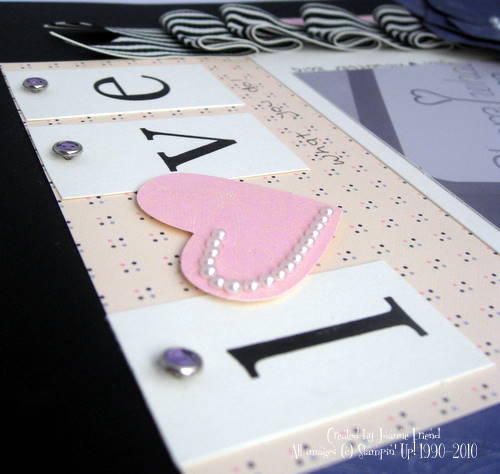
Here's an album I did recently using the One Great Year scrapbooking kit (#118705 - £17.75).
This wasn't my idea, I got the instructions for the album from Andrea Walford and her Family Treasures Scrapbook class. Family Treasures is a scrapbook kit that is no longer available, so I used the same album design, but rejigged it myself using one of our latest kits.
What's even better is that you only need half of the kit to make this, so you could make two - one for yourself and one as a gift! Here are the other pages:
On the left are two tags that pull out for photos or journalling.
On the right you will see that behind the Elegant Eggplant mat is another pull out for journalling.
Lots more space for journalling!
Another pull out on the left behind the green mat.
Another pull out on the right.
I absolutely love this kit as it lends itself perfectly to this type of album. The only extras I had to add were a few clips from the clip assortment (#112580 - £7.95) and Basic Black tafetta ribbon (#119962 - £6.25). It was quite time consuming, but completely worth it. The design of the album is beautiful when finished and well worth the extra effort!
TFL! Joanne x
Wednesday, 22 June 2011
Wednesday, 11 May 2011
New Class - 21 May 2011!
I love the new Stampin' Up! Springtime Vintage Designer Series Paper. It's so lovely and summery in a Cath Kidston type of way. Because of this, it lends itself beautifully to the bargello technique which I will be teaching at my next class. This produced a gorgeous "quilted" effect paper which is great to use on cards or scrapbook pages or albums.
As well as making our quilted paper, we will also be making this cute little 6"x6" mini album, which is based on a never ending card. Here's a few more pictures of the other faces of the album:
I've used the Vintage Wallpaper embossing folder for the embossed panels.
The little quilted hearts come from our handmade quilt paper.
As you can see, there's plenty of room for little photos. I printed out a contact sheet with my photos on of our recent holiday and just used those.
This class is priced at just £10. Included in the price will be half a pack of the beautiful Springtime Vintage Designer Series Papers and cardstock to complete the project. We will make a large enough sheet of quilting to emable you to have plenty left to make a couple of cards as well as the album. All you need to bring is your paper trimmer, scissors and your favourite double sided sticky tape, although I will have of spares. Everything else will be provided.
The price includes hot beverages and cake for sustenance, but please bring your own lunch (there's a very good sandwich shop opposite the church). To book, please either pay via my website HERE, or contact me by email to book a place and pay me on the day.
TFL! Joanne x
Tuesday, 19 April 2011
New Class - 30 April 2011!
Hello Everybody!
The papers and goodies we will be using are all taken from the new mini catalogue. You will receive half a pack of the Sweet Stitches Designer Series Papers, ribbons, buttons, pins, embellishments AND also the wonderful new Pattern Pieces stamp.
During this class we will learn new techniques of ruching ribbon and faux needlework, as well as different techniques to do with your stamp including making a background and paper piecing.
The whole class is available for £20. If you'd like to come along then you can book through my website here.
TFL! Joanne x
Just a quick post telling you about my latest class which will be held at Beauchief Baptist Church on Saturday 30 April.
First of all we will be making an ingenious little mini album using origami techniques. This album is big enough to hold 8 different inserts for your photographs and journalling. But that's not all!
We will also be making a beautiful little box using the SU! exclusive envelope die and five small cards to put in it. Here's a close up of all the cards we will be making:
The papers and goodies we will be using are all taken from the new mini catalogue. You will receive half a pack of the Sweet Stitches Designer Series Papers, ribbons, buttons, pins, embellishments AND also the wonderful new Pattern Pieces stamp.
During this class we will learn new techniques of ruching ribbon and faux needlework, as well as different techniques to do with your stamp including making a background and paper piecing.
The whole class is available for £20. If you'd like to come along then you can book through my website here.
TFL! Joanne x
Friday, 1 April 2011
It's here!!
The new Mini Catalogue goes live today and it contains the Big Shot! Have a look on the right hand side of the page. Just click on the image and it will take you through to the PDF. Hopefully I'll be back in the next few days with some samples. But for the meantime, enjoy!
TFL! Joanne x
Sunday, 6 February 2011
Card Candy Blog Hop!
Hello Everybody!
Maybe I'm the first blog you've visited on this hop, or maybe you've just seen the gorgeous card candy of the very talented Jan. Either way, welcome!
Myself and two of my Teamies, Sara and Jan, all share a love for Card Candy. So after the success of our last blog hop, we thought we'd do another one sharing our passion!
This is the card candy I did:
Sara and Jan both really liked the chest of drawers I made. This is easily done with a rectangle of Crumb Cake cardstock measuring approximately 6.5cm x 7.5cm, the Word Window punch finishes the chest off across the top and the drawers are made with the Modern Label punch. The little feet at the bottom are the 3/4" circle punch. The drawer handles are made from our beautiful pearls.
All the colouring in was done with markers and a blender pen. The scalloped circles around the main poem are made using two of the Large Flower punch in Daffodil Delight.
I hope you like them and I'm now going to pass you on to the lovely Sara. Believe me, you're in for a treat - her card candy is stunning!
TFL! Joanne x
Maybe I'm the first blog you've visited on this hop, or maybe you've just seen the gorgeous card candy of the very talented Jan. Either way, welcome!
Myself and two of my Teamies, Sara and Jan, all share a love for Card Candy. So after the success of our last blog hop, we thought we'd do another one sharing our passion!
This is the card candy I did:
This set is Bundle of Love. The colours I used are Crumb Cake, Daffodil Delight, Certainly Celery, Pretty in Pink and Baja Breeze. I apologise for the state of my pictures, I need a new camera!
Sara and Jan both really liked the chest of drawers I made. This is easily done with a rectangle of Crumb Cake cardstock measuring approximately 6.5cm x 7.5cm, the Word Window punch finishes the chest off across the top and the drawers are made with the Modern Label punch. The little feet at the bottom are the 3/4" circle punch. The drawer handles are made from our beautiful pearls.
All the colouring in was done with markers and a blender pen. The scalloped circles around the main poem are made using two of the Large Flower punch in Daffodil Delight.
I hope you like them and I'm now going to pass you on to the lovely Sara. Believe me, you're in for a treat - her card candy is stunning!
TFL! Joanne x
Sunday, 2 January 2011
Happy New Year! It's Saleabration Time!!
Hello Everybody and a Happy New Year to you all! Here's a quick card I made to go out to some of my customers enclosing something very special - the Saleabration brochure!
For those of you who don't know, Saleabration lasts from 30 December to 28 February. During this time, for every £45 you spend on Stampin' Up! goodies, you get an exclusive, limited edition stamp set absolutely free! The stamp sets this year are absolutely beautiful. As can be seen below:
The above set is called Bliss
This set is Punch Bunch
This one is So Happy For You
And this one (which has come out smaller for some reason) is Sweet Summer.
The favourite so far seems to be the Punch Bunch. This is even better when you know that we will be getting the Owl Punch in the new mini catalogue which will be available on 1 April!
If you'd like more information, or would like to place an order, just let me know. I'll be making some samples in the coming weeks, so watch this space! Now I'm off to carry on devising my classes for this year.
Take care and thanks for looking!
Joanne x
Sunday, 12 December 2010
Hello Everybody!
Well, I think it's about time, don't you? Not blogged for ages, what with one thing and another. Had so much on and just never found the time.
Anyway, myself and one of my lovely local downlines, Sara and her downline, Jan, are doing a mini blog hop showcasing layouts done of photographs taken at Convention and here's mine!
I decided to do the photograph in black and white as I know Jan loves these Lap of Luxury papers and everytime I see them I now think of her!
I love making the flowers - they remind me of an anemone or water lily. These are made by punching lots of baubles with the bauble punch (approximately 15) and them sticking them around a scallop circle. They're dead easy but very effective I think.
As for the Pearls and Rhinestones - I just can't get enough of them! I love a bit of bling on my stuff!
Anyway, I know Jan and Sara both have gorgeous layouts to show, so here's a link to Sara's beautiful blog and her layout.
Bye for now, and I won't leave it as long next time, I promise!
Joanne x
ETA: Thanks everyone for the lovely comments, especially about my flower. This is not my idea, I can't remember exactly where I first saw it, but we had a wonderful demonstration of it from Julie Kettlewell at Convention too! I just wanted to say that. There's no way I'm clever enough to come up with an idea like that! LOL!
Anyway, myself and one of my lovely local downlines, Sara and her downline, Jan, are doing a mini blog hop showcasing layouts done of photographs taken at Convention and here's mine!
I decided to do the photograph in black and white as I know Jan loves these Lap of Luxury papers and everytime I see them I now think of her!
I love making the flowers - they remind me of an anemone or water lily. These are made by punching lots of baubles with the bauble punch (approximately 15) and them sticking them around a scallop circle. They're dead easy but very effective I think.
As for the Pearls and Rhinestones - I just can't get enough of them! I love a bit of bling on my stuff!
Anyway, I know Jan and Sara both have gorgeous layouts to show, so here's a link to Sara's beautiful blog and her layout.
Bye for now, and I won't leave it as long next time, I promise!
Joanne x
ETA: Thanks everyone for the lovely comments, especially about my flower. This is not my idea, I can't remember exactly where I first saw it, but we had a wonderful demonstration of it from Julie Kettlewell at Convention too! I just wanted to say that. There's no way I'm clever enough to come up with an idea like that! LOL!
Monday, 30 August 2010
Stationery Set
Hello Everybody! This is the next class that I'm going to be doing. It's a beautiful stationery set made using the Groom Specialty papers along with Pretty ink Pink and Melon Mambo. I love these colours together!
Here's a few more photos of what's inside the set:
Here's a quick pick of everything together. As you can see you will make four cards, four notelets and three tags.
Here's a closeup of the cards together. All done with the Baroque Motifs stamp set.
These are my favourites! These little notelets are made using the Bella Toile background stamp. It's such a beautiful background stamp, it's so versatile and it's perfect for this set!
And finally the three little tags, again made with Baroque Motifs.
This would make a wonderful set for yourself or as a gift for someone else - get organised for Christmas! More details about this class can be found at my website here.
TFL! Joanne x
Friday, 13 August 2010
Feeling Christmassy!
I might as well be feeling Christmassy, seeing as the weather seems a bit like this at the minute! It's so cold the heating's clicked on!
This is another card I made following instructions by the amazing Michelle Zindorf on her site. Again, I've used the branch from Bird On A Branch. Just goes to show how versatile this set can be, two completely different cards using just one of the stamps from this set!
This card could be used as a Christmas card, or even a generic greetings card for someone who just likes snow (like me!)
Anyway, I must be off. Getting ready for the crop tomorrow. The technique we will be doing is salting, so I'll have another card to show you after we've all got ready salted!
TFL! Joanne x
Wednesday, 11 August 2010
Sunset Card
Hello Everybody!
I promised you more cards using the sets that are 20% off at the minute, and here's another one using the twig from Bird on a Branch. I love this set. It's so versatile and can be used for all sorts of occasions.
As previously, this card is a blatant CASE of a tutorial on Michelle Zindorf's blog. That lady sure knows how to use a brayer! The colours used are Not Quite Navy, Taken with Teal, Pumpkin Pie, Apricot Appeal and Basic Black for the inks and Not Quite Navy, Pumpkin Pie and Basic Black for the cardstocks.
TFL!
Monday, 9 August 2010
Tranquil Trendy Trees
I made this card a couple of days ago and I'm really chuffed with it. It's the first time I've had a serious go at brayering, so I decided to try something reasonably simple!
This is a CASE of a card and tutorial by the amazingly talented Michelle Zindorf. The colours I used are Bashful Blue and Brocade Blue. I love the say it looks so atmospheric.
Don't forget this is one of the stamp sets available in the two step offer at the minute! Instead of being £12.95, this set (Trendy Trees) is currently at 20% off and is selling at £10.36 until 31 August. If you'd like to order just get in touch!
TFL! Joanne x
Saturday, 7 August 2010
Two Step Offer!
Sorry I've not posted for a while. School holidays - you know how it is.
Well, despite being super busy with Harvey, I have managed to do a little work. How's about this card:
It's a CASE based on a card in the Stampin' Up! catalogue. The reason I made this card is because we have an offer on at the minute. Quite a few of the two step stamp sets are 20% off at the minute! Here's the ones included:
Loads of Love - was £18.95, now £15.16
Big Bold Birthday - was £23.95, now £19.16
Trendy Trees - was £12.95, now £10.36
Greenhouse Garden (pictured) - was £22.95, now £18.36
Something Sweet - was £23.95, now £19.16
Tiny Tags - was £18.95, now £15.16
Bird on a Branch - was £14.95, now £11.96
This offer is only on until 31 August, so if you'd like to take advantage, let me know as soon as possible!
Also, I have a special offer of my own to offer - free P&P on all orders from now until 1 October when the new catty comes out! On 1 September we will receive the retirement list for those stamp sets that will be leaving the catalogue, so now is the perfect opportunity to get stocked up at these special prices and with the free P&P!
If you'd like to order or book a workshop, you can get in touch with me at Joannefriend9920@aol.com.
TFL! Joanne x
Saturday, 10 July 2010
Summery roses
I think it's about time I uploaded something again, don't you?!
First of all, take a square of paper and round the corners. For the roses on my card I used one piece of 3" x 3" for the large rose and two pieces of 2 1/2" x 2 1/2" for the smaller roses. Round the corners with scissors (this isn't an exact science, just snip the corners off basically) and draw a spiral onto your paper with pencil.
This is a card I made yesterday. You like? Here's a little tutorial on how I made the roses. They're probably the simplest flower you'll ever make (bar just punching them out!)
First of all, take a square of paper and round the corners. For the roses on my card I used one piece of 3" x 3" for the large rose and two pieces of 2 1/2" x 2 1/2" for the smaller roses. Round the corners with scissors (this isn't an exact science, just snip the corners off basically) and draw a spiral onto your paper with pencil.
Now you need to cut around your pencil spiral with scissors. I should just point out that you don't need to use squares of patterned paper, you can use punched circles if you have circle punches that are big enough!
*GASP!* What has she done?! ;O) You need to crumple your spiral to help soften and break the fibres in the paper to make it more malleable when it comes to rolling your rose.
Now here comes the fun bit! Starting from the outside edge, roll your spiral in towards the centre. Don't worry if you do it too tight, just loosen your grip and your roll will relax out a little. Don't worry about it being neat, these roses are supposed to be "abstract"!
When you get to the end, place a dab of glue or a glue dot on the centre bit of your spiral and stick it down as shown. It should keep the bloom in place no problem. If not just add a bit more glue.
And there you have it! The sky's the limit with these roses. It's a great technique for using scraps of patterned paper or cardstock. You could add a bit of bling with Dazzling Diamonds glitter, Shimmer Paint or Crystal Effects.
For the card above I used the following:
Cardstock - Whisper White, Tempting Turquoise, Regal Rose
Ink - Pumpkin Pie
Designer Series Paper - Pink Flamingo
Ribbon - Pretty in Pink Tafetta, Old Olive Grosgrain
Button - Playground Buttons
Sentiment - Sincere Salutations
Border Punch - Vintage Lace
All products Stampin' Up!
Tuesday, 22 June 2010
A little birdie....
Just a quick post today. Here's a card I made using Bird on a Branch. I find this is one of those sets that doesn't do itself justice in the catalogue, but then when you get it and actually use it you see just how fab and versatile it is. It's quickly become one of my "go to" sets, because it doesn't matter what you do with it, you always get a fabby result.
For this card I've used my colour combination of the moment - Melon Mambo, Pretty in Pink, Basic Black and Whisper White. The patterned paper is from the Night & Day DSP. I'm using Melon Mambo a lot, I love it!
TFL! Joanne x
Wednesday, 16 June 2010
Christmas in July!
Yeah! Middle of June and I'm already thinking about Christmas!
The above photo is a collection of cards I will be doing at my next workshop on 3 July. It will be a One Sheet Wonder, whereby we decorate a sheet of 12x12 Whisper White with the gorgeous Serene Snowflakes stamp set and squoosh it with Shimmer Paint, then use it to make 18 Christmas cards.
So by the end of the workshop, at the very beginning of July, you've already made 18 Christmas cards. How organised are you?!
We will be using lots of different techniques in this workshop. Below are some of my favourites that are included in the set.
Sorry about the poor pictures, my camera AND computer are playing up at the minute. :O(
Shaker card!
Large baubles!
Even a treat cup! YAY!
If you'd like to book onto the workshop, just have a look at my website HERE. That's where all the details are.
TFL! Joanne x
Subscribe to:
Posts (Atom)